Web Design
Domain
Beginner Friendly
How to Get a Domain for Your Website (Easy Beginner Guide)
Your domain is your website’s address, like a house number on the internet. Here is how to get a domain from Namecheap and connect it to Hostinger, in simple steps. 🌐
By Mariam • • 7 min read
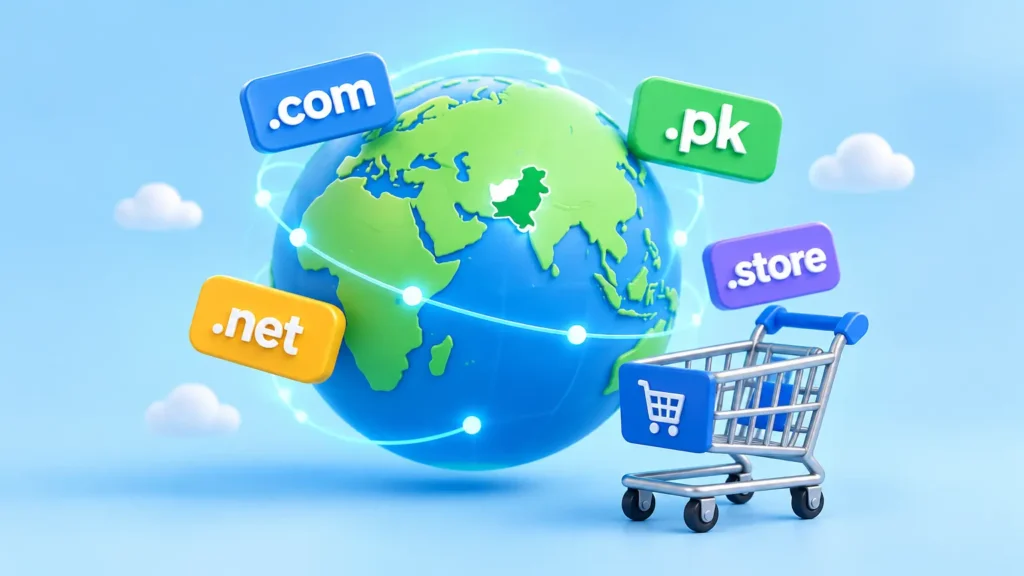
In this guide, I will show you how to get a domain for your website, step by step. I buy my domains from Namecheap, and it works the same way whether you live in the USA, the UK, Pakistan or anywhere else. First, we will find a good name and buy it. Then we will connect it to your Hostinger hosting, so your website finally has its own address.
Don’t worry, it is much easier than it sounds. If you can order something online, you can buy a domain. 😊
What You Need to Get a Domain
Keep These Ready
Two or three name ideas (in case your first one is taken)
An email address that you check every day
A debit or credit card with online international payments turned on
Your Hostinger account, if you want to connect the domain today
What is a domain? It is the name people type to find you, like freshideawithme.com. You buy it for a year, and then you renew it every year.
.com or a country ending? For most people, .com is the best choice, because the whole world knows it. Country endings like .co.uk or .pk are only worth it if all your customers are in that one country. Also, Namecheap doesn’t sell every country ending (.pk, for example), so you may need a local seller for those.
How to Choose a Good Domain Name
Before you get a domain, remember that it stays with you for years, so choose it with love. Here are my three simple rules:
Short and Easy
Say it on the phone once. If the other person can type it without asking again, it’s a good name.
No Numbers or Hyphens
Names like my-shop-123 are hard to remember and easy to type wrong. So keep it clean.
Same Name Everywhere
Check that the same name is free on Instagram, Facebook and TikTok too. That makes your brand easy to find.
My golden rule: Once you choose your name, buy it the same day, and don’t announce it before buying. I shared more about this in how I started my brand from my phone.
A Domain Needs a Home Too
Address + Home + House = Website 🏡
A domain alone is just an address. Your website also needs a home (hosting) and a house built on it (your WordPress website). So once your domain is ready, these two guides will take you all the way.
How to Get a Domain: 12 Easy Steps
We will do this in two parts. Steps 1 to 7 are about buying your domain, and steps 8 to 12 are about connecting it to Hostinger. Ready? Let’s go!
Step 1
Search Your Domain Name
First, go to Namecheap. Type the name you want in the big search box and click Search.
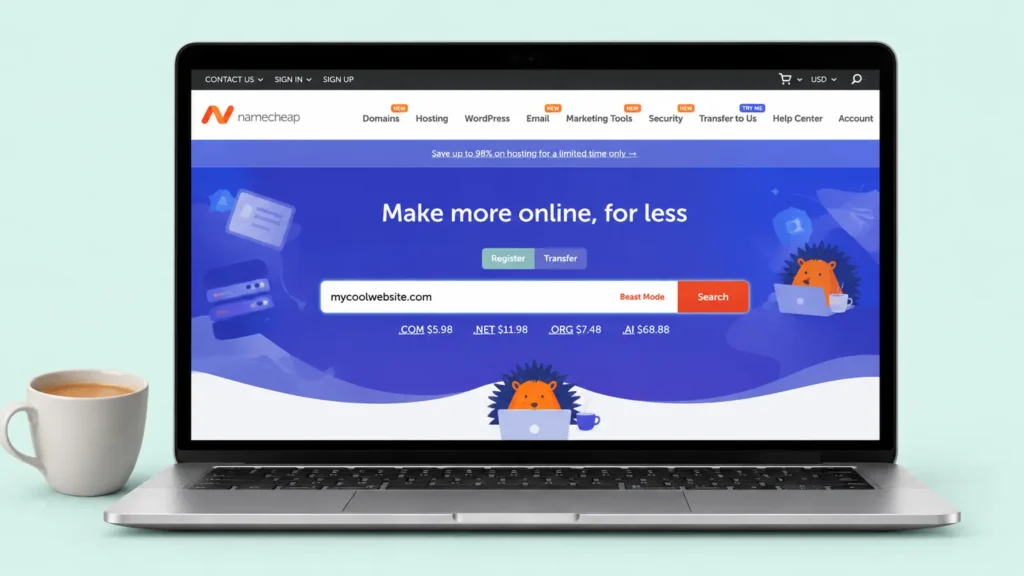
Type your dream name and search.
Step 2
Pick an Available Name
Next, you will see a list of results. If your name is free, it shows an Add to Cart button. If it says Taken, try your second idea or another ending.
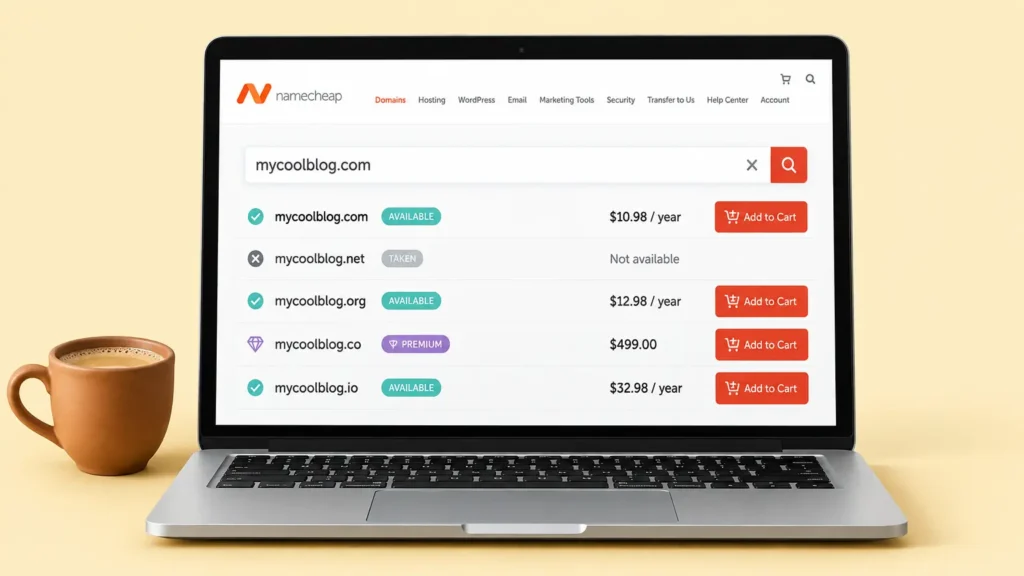
Available names have an Add to Cart button.
💡 Careful: Names marked Premium cost much more than normal names. For your first domain, skip them.
Step 3
Go to Checkout
After adding your name, click View items and then Checkout. Namecheap may also offer hosting or SSL. You don’t need them, because Hostinger already gives you hosting and free SSL.
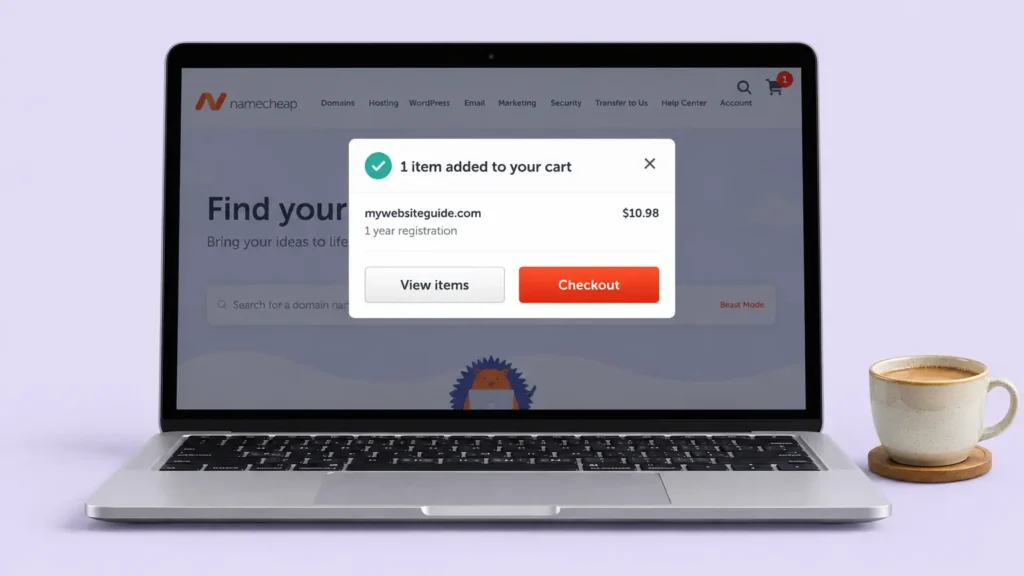
Skip the extras and go to checkout.
Step 4
Check Your Cart
Now choose how many years you want (one year is fine). Turn Auto-Renew on, so you never lose your name by mistake. Also keep Domain Privacy on. Then click Confirm Order.
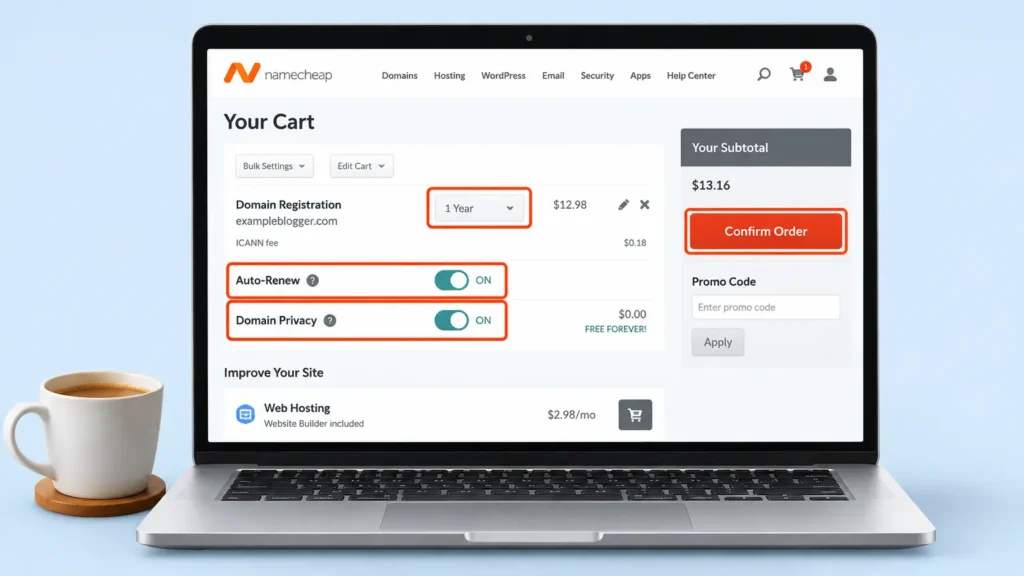
Years, auto-renew and domain privacy in one place.
Step 5
Create Your Account
Then sign in, or create a new Namecheap account on the same page. Use your real email, because all renewal reminders will come there.
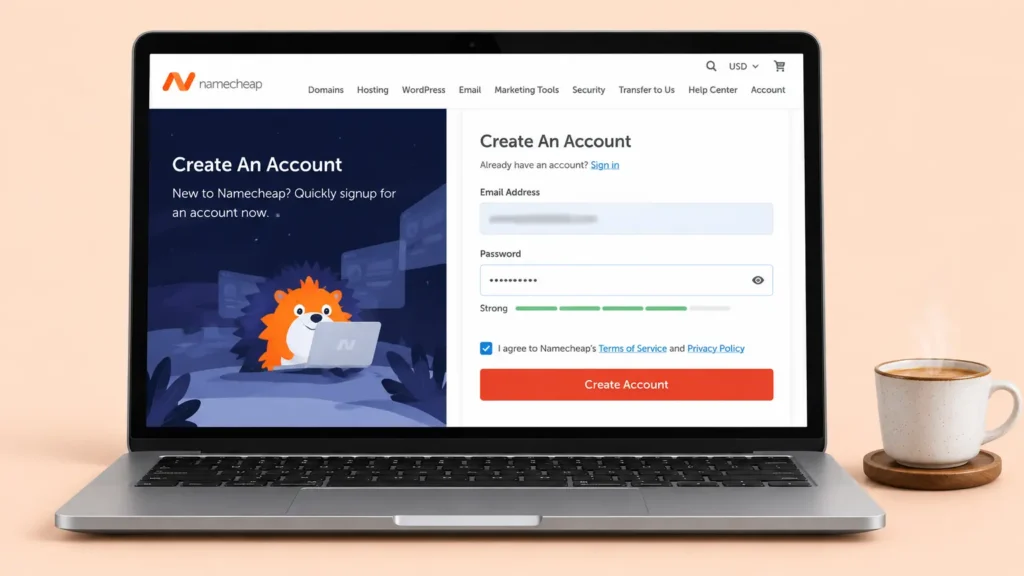
Make your Namecheap account.
Step 6
Add Your Contact Details
After that, Namecheap asks for your name, address and phone number. Write your real details, because the domain will be in your name. And don’t worry, Domain Privacy hides them from the public.
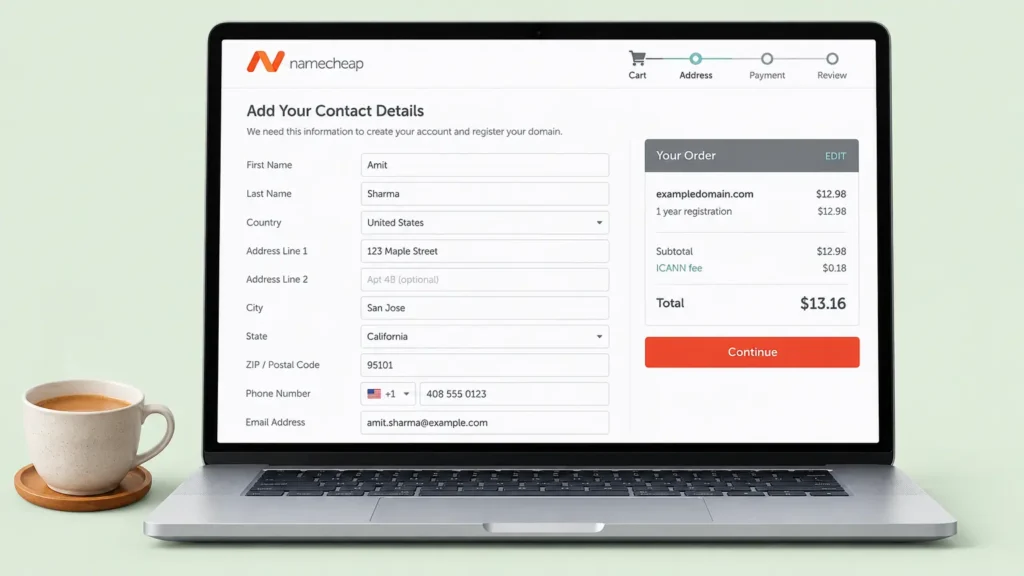
Your details stay private with Domain Privacy.
Step 7
Pay and Celebrate
Finally, choose card payment, type your card details yourself, and click Pay Now. Congratulations, the domain is yours! 🎉
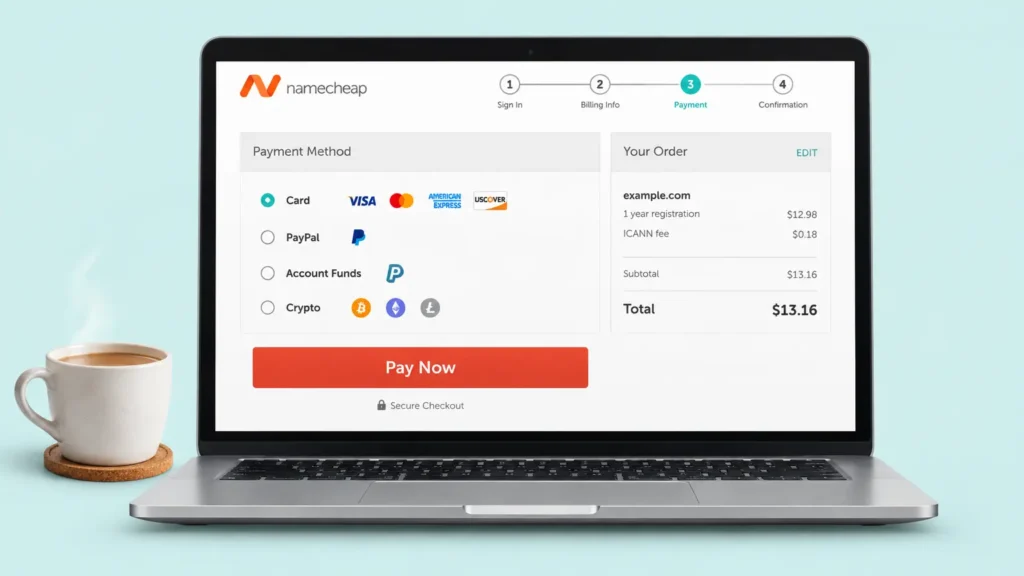
Pay Now, and the name is yours.
💡 Payment failed? Usually, your bank has blocked international payments. Turn them on in your banking app, and then try again.
Step 8
Find Your Hostinger Nameservers
Now open your Hostinger account. When you add your website with a domain you already own, Hostinger shows you two nameservers to use. Usually they are:
ns1.dns-parking.com
ns2.dns-parking.com
But always copy the ones Hostinger shows you.
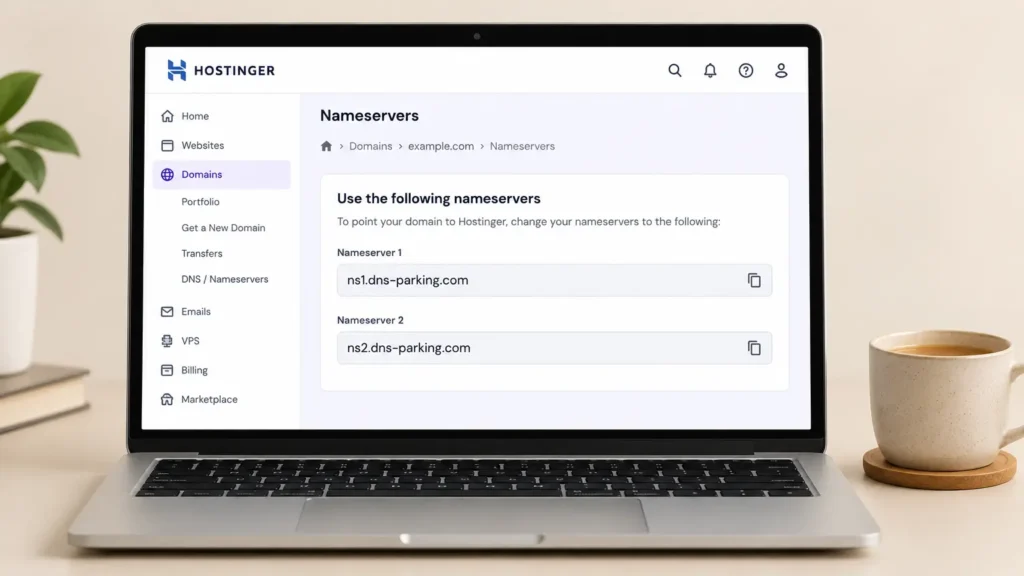
Copy the two nameservers from Hostinger.
Step 9
Open Domain List in Namecheap
Next, go back to Namecheap. In the left menu, click Domain List, and then click Manage next to your new domain.
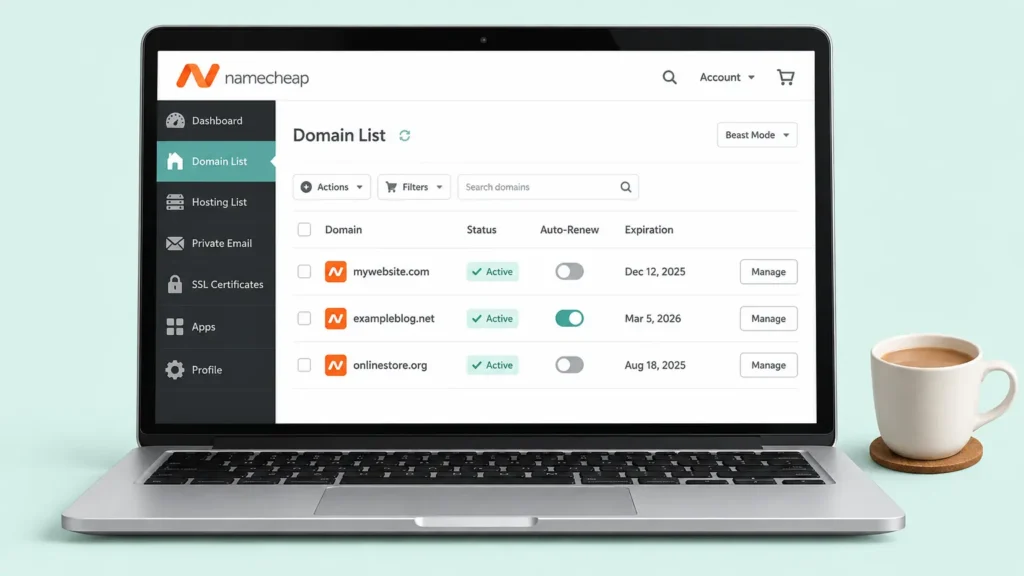
Domain List, then Manage.
Step 10
Choose Custom DNS
Find the Nameservers section and change it to Custom DNS. Then paste the two Hostinger nameservers and click the green tick to save.
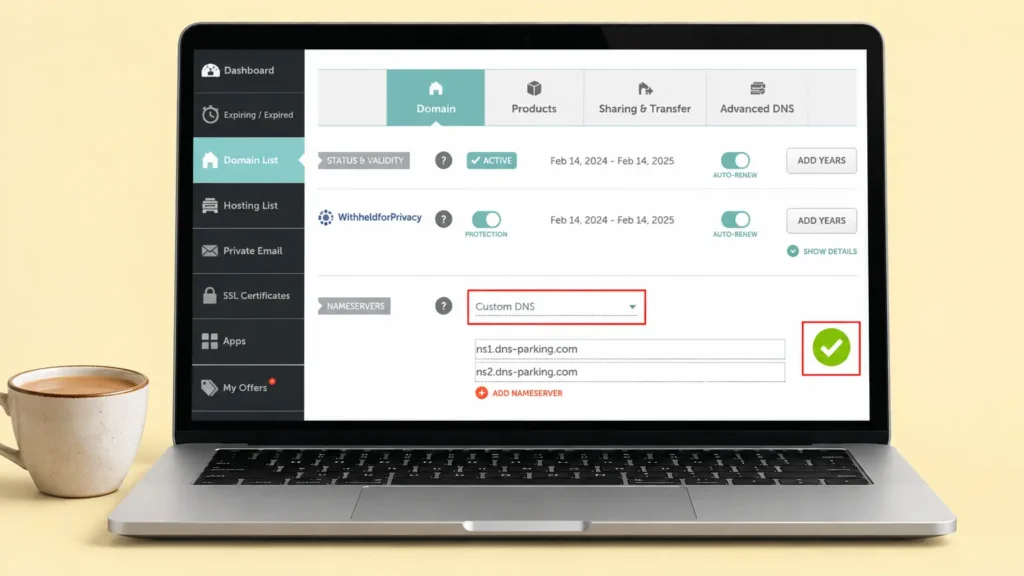
Custom DNS, paste, and click the green tick.
Step 11
Wait a Little
Now relax. It can take a few hours, and sometimes up to 48 hours, for the whole internet to learn your new address. Meanwhile, you can start building with my website guide.

Grab some chai while the internet updates.
Step 12
Check Your Domain
Finally, type your domain in the browser. Do you see your website? Yay! And if you see the little lock in the address bar, your free SSL is working too. 🔒
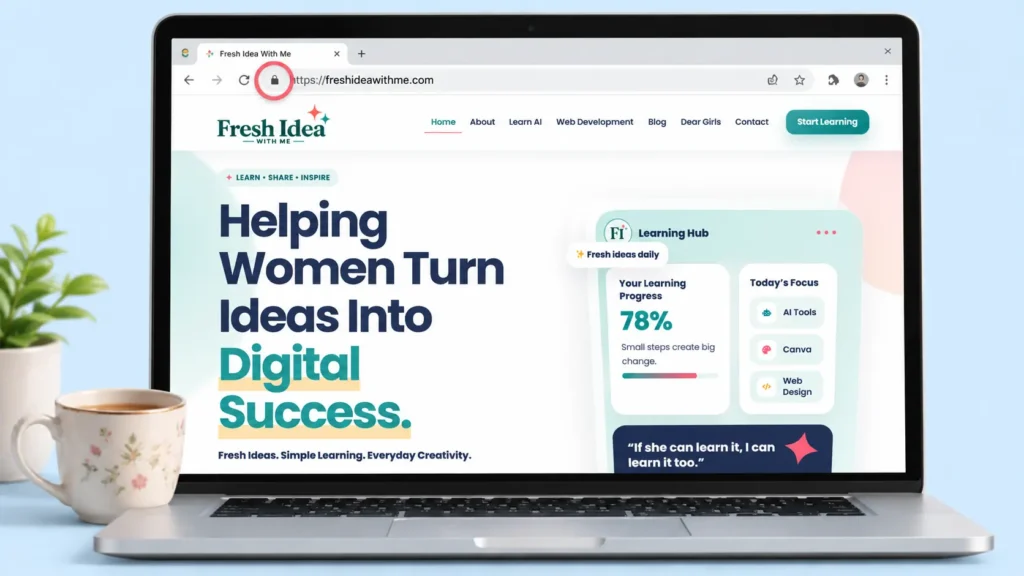
Your domain is live and connected.
Safety Rules After You Get a Domain
After you get a domain, keep it safe, because losing a domain is like losing your shop’s address. So please follow these little rules.
Keep Your Name Safe
Keep Auto-Renew on, always.
Buy the domain in your own name, even if a designer builds your website.
Turn on two-factor authentication in your Namecheap account.
Use an email you check daily, so you don’t miss renewal reminders.
Save your renewal date in your phone calendar.
Quick Questions
Can I buy a domain on Namecheap from any country?
Yes. Namecheap sells domains to people all over the world. You just need a debit or credit card that allows online international payments.
Should I choose .com or a country ending?
For most people, .com is the best choice, because everyone knows it. However, if you only work in one country, a local ending like .co.uk or .pk can also work. Just remember that some local endings are sold only by approved local sellers.
Is domain privacy free on Namecheap?
For most domain endings, Namecheap gives Domain Privacy for free, and it is turned on by default. Still, check that it is on in your cart.
How long does it take for my domain to work?
Usually a few hours. But sometimes it takes up to 48 hours after you change the nameservers, so be patient.
Do I pay for my domain every year?
Yes. A domain is like rent, so you renew it every year. Also, the renewal price can be different from the first-year price, so check it before you buy.
Do I need a domain to create a website?
Yes, if you want a real website with your own name. Free addresses like yourname.wordpress.com are fine for practice, but your own domain looks professional and people trust it more. And as you saw above, getting a domain only takes a few minutes.
Can I get a domain for free?
Kind of! Many Hostinger plans give you a free domain for the first year when you buy hosting for 12 months or more. I show how to claim it in my hosting guide. After the first year, you pay the normal renewal price.
Final Thoughts
Your domain is the first thing people will remember about your brand. And now you know exactly how to get a domain: pick a short name, buy it quickly, and connect it to Hostinger in a few clicks. So take your time choosing it, but once you choose, don’t wait too long, because good names get taken fast.
Now you have all three pieces: a domain (your address), hosting (your home), and WordPress (your house). Next, let’s decorate that house with my step-by-step website guide. 🌸
With love,
Mariam
Name Reveal
What’s Your Domain Name? ✨
Did you buy your domain? Share it in the comments, because I’d love to visit your website when it is ready! And if you are still thinking about a name, tell me your ideas.